How To Install A Shower Faucet

How To Install A Shower Faucet
By
Zia
|Last Updated: 08 Apr 2024
Updating your shower faucet can be a do-it-yourself job but it would always be best to have a run-through of the instructions for a smooth and easy project.
Step 1: Turn off the water

Before you can replace the fixtures in your shower, you'll first need to start by turning off the water supply. Unless you happen to have a separate cutoff valve installed in the bathroom, you'll need to shut off the water to the whole house. Open up a faucet at a lower level in your home to relieve pressure in the lines.
Step 2: Remove the Old Trim
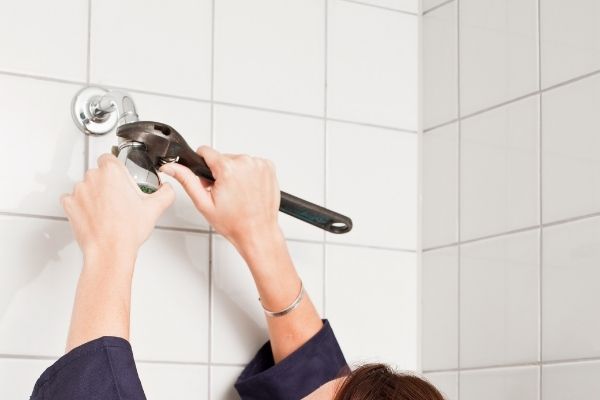
Take off the shower head by turning the connecting nut counterclockwise with a pair of channel lock pliers. To protect the finish, wrap a cloth around the connection first and hold the shower pipe with your other hand to keep it from turning inside the wall. Faucet handles can be removed in different ways, some have a cover plate which can be pried off with a small screwdriver, others like this one have a small set screw somewhere on the handle. Once it's loosened with an Allen wrench you can remove the handle gaining access to the parts below. The remaining components of the handle either unscrew or pull off. Keep removing parts until you reach the valve in the wall, if you have a tub spout this will either be removed with a set screw or will twist off by turning it counterclockwise. You can use the channel locks to loosen it but remember to protect the finish with the cloth and don't use excessive force.
Step 3: How a shower works

The plumbing inside the wall is configured for the type of shower faucet you have. Hot water typically comes in from the left, cold water from the right. The two are mixed in the valve and will either go up to the showerhead or down to a tub spout. A diverter directs which way the water goes. Because your new faucet is designed to work in a specific brand of the valve, there's a good chance you'll have to install a new valve in the wall whenever you install a new shower faucet. To do that, you'll need to gain access to the plumbing inside the wall by removing the section of drywall around the current valve. New trim kits for your brand of faucets are often available, these allow you to change the look of your bathroom without replacing the valve behind the wall but the selection of styles is limited.
Step 4: Remove the old valve

Many people find plumbing intimidating so you might consider having a professional handle these next few steps and install the new valve for you. To put in a new valve, you'll first need to remove the old one from inside your shower. To gain access, cut out a section of drywall approximately a foot square on the other side of the wall from your shower valve. To help with locating the valve drill a pilot hole or two from the bathroom side next to the valve with a long bit. Measure an even square on the back wall and cut the section out with a drywall saw—save the piece to reinstall later. The valve is mounted to a stringer running between the studs to remove it. You'll first need to cut the copper pipe with a tubing cutter. Cut the pipe going up to the shower as well as the hot and cold lines below. With the pipe cut, use a reciprocating saw to take out the stringer with the old valve still attached.
Step 5: Choose a new valve

Make sure you purchase the correct valve for the faucet you're planning to install in your shower. It should have two inlet channels for the hot and cold water and two outlet channels for the tub spout and showerhead. Each of these fittings connects to your pipe either through male threads on the outside of female solder ports on the inside. If your bathroom has either a tub or shower only then the second outlet channel will need to be capped off in the installation. Shower only valves are also available for bathrooms without a tub. The valve itself must come out the correct distance from the wall and is mounted to a stringer which is a brace running between the studs. Allow for the depth of the valve, the water-resistant drywall, and the thickness of the tile or shower enclosure when setting the proper depth for the stringer. The instructions that come with the valve will show the correct dimensions for the valve and its plumbing.
Step 6: Sweat the pipes

To connect to the valve we're going to attach female adapters to the ends of the copper pipe. To ensure a leak-free connection, fittings should be soldered using a torch and lead-free solder (this process is also called sweating the pipes). To get started, use a deburring tool to clean up the ends of the pipe. Insert it over the end and rotate it around several times until the section is shiny. Use the wire brush to clean the inside of the fittings. Apply a light coating of solder paste or flux to the inside of the valve fittings and the cleaned end of the copper pipe. Insert the end of the pipe into the adapter. Use a torch to heat the middle of the fitting. Apply solder to the joint between the pipe, letting it melt into the seam all the way around - don't overdo it. The flux will dissolve oxides and draw the solder into the seam.
Step 7: Other connections

If you don't want to get into using a torch, shark bite solderless connectors can make all the connections for you and provide a leak-free seal. These come in a variety of configurations. To install, simply push on and lock, if you need to remove one a special tool is used to release the compression fitting. Just make sure you thoroughly clean the ends of each pipe and allow seven-eighths of an inch for the connector to overlap each side. If you're making connections to the threaded fittings, make sure you apply a layer of Teflon tape or pipe dope to the threads before installing.
Step 8: Assemble the new valve section

You can use the old valve section as a guide for assembling your new one. Measure and cut sections of pipe to fit the new valve. Since heating up the valve could damage internal components if done incorrectly, we've soldered female adaptors to the ends of the copper pipe. These will be cut and attached to the threaded outlets of the valve. The remaining connections will be made with shark bite connectors that push on and lock.
These will be elbows for the hot and cold valves and couplings for the straight sections of the pipe. Remember there are different ways to make the plumbing connections, so choose the method you feel most comfortable with. Clean the ends of the pipes with a sand cloth and install the new valve section into the plumbing of your bathroom. You may be able to reuse the old tub spout pipe for the installation. Make sure all the plumbing is connected properly before proceeding to the next step.
Step 9: Install a Stringer

The new valve must be set to the correct depth in the wall for the faucet to install properly - it should account for the thickness of the drywall as well as the tile or shower enclosure on your walls. Most valves come with instructions or a guide to help you get the dimensions right. The valve is mounted to a stringer which is crosspiece support in the wall. In most bathroom installations the stringer will be set to the proper depth-first and the valve will be mounted to it but since we're replacing a faucet in an existing bathroom, we'll need to install our supports from the opposite side.
Step 10: Test your shower

Once you've finished making all your connections, you're now ready to test the system for leaks. If it's not already installed, screw the test cap onto the valve and tighten down the bonnet nut holding it on. Remember, your shower valve may work differently so consult your instructions before proceeding. Before testing, you'll also need to cap off the showerhead and tub spout connections if you have them as well. Have someone turn the water back on while you check all the connections to make sure there are no leaks. If everything is okay you'll turn the water back off, remove the caps and patch up the wall. If you chose to have a plumber handle putting in the new valve and testing for leaks you should be able to finish the rest of the shower installation yourself.
Step 11: Install the cartridge

Each shower faucet will have specific installation instructions so follow the directions laid out in your owner's manual. Some valves come with a cartridge already installed if yours does, you can skip this step. Other manufacturers include the cartridge as part of the faucet you purchase and it needs to be installed into the valve first. To install the cartridge for this faucet make sure it's positioned correctly according to the manufacturer's instructions. Then push it firmly into the valve making sure the marks in the cartridge line up with the slots on the valve. When inserted properly, it should have a snug fit. Screw on the bonnet nut and tighten it down with channel lock pliers.
Step 12: Install a tub spout

To install the tub spout, we're going to solder the enclosed adapter to the outlet pipe. First, apply a layer of flux to the outside of the surface, then slide the adapter over the pipe but before you do remove the o-ring and any other components that could be damaged from the heat.
Use a torch to heat the adapter and apply a small bead of solder to the outside scene - place a piece of cardboard inside the tub to catch any drips. After it cools place the o-ring back on and screw the tub spout onto the adapter by turning it clockwise. Your tub spout may install differently so consult your owners manual for the correct installation instructions.
Step 13: Install the showerhead

All showerheads are usually installed the same way, simply by screwing the nut onto the threads of the shower arm. This particular unit has a hand shower built into the showerhead so there's an additional step involved. Before installing, wrap some Teflon tape clockwise around the threads of the arm, screw the showerhead onto the threads until it's hand tight. To protect the finish it's important to use a cloth and a pair of channel lock pliers to tighten it down completely. Attach one end of the hose to the hand shower, add Teflon tape to the hand shower connection on the showerhead, and screw on the other end of the hose. Not all faucet connections require Teflon tape so check the manufacturer's instructions before proceeding. Snap the hand shower into the cradle or any other mount that comes with the unit.
Step 14: Install the trim handle

For the shower handle, there will be some type of sleeve that slides over the top of the cartridge and valve, make sure you include any o-ring and spacer that's called for in the installation. Next comes the escutcheon which covers up the rough opening, this goes around the sleeve against the wall and is held in place by screws. Before you install the handle, you'll need to first adjust the temperature limit stop which we'll cover in our next section.
Step 15: Set the temperature limit stop

Now you're ready to test out the new shower faucet. To prevent scalding, the outlet temperature on your shower must be no more than 120 degrees. Turn on the water supply and make sure there are no leaks then slip on the handle and turn the water to the hottest position. After it warms up take a glass and thermometer and check the temperature of the water. Turn off the water and remove the handle to gain access to the temperature limit stop. This is usually a ring or clip that's pried up, turned either clockwise or counterclockwise according to the needed adjustment, and then reinsert it. Follow your faucet's instructions and check after each adjustment until you reach the desired maximum temperature. Attach the handle by tightening the set screw with an Allen wrench. Your new shower faucet is installed and ready to use.
*All images are from the internet.
Though it has been proven that installing a new shower faucet can just be a DIY project, it still wise to hire plumbing experts or home remodeling companies like Eano Home Renovation. At Eano, you can avail of various home improvement services that are rendered on time and on-budget! Curious about how to do your next home remodel? Feel free to leave us a message or book your free appointment with us today!


